How I Shoot Group Portraits
One of the most common questions i am asked is “how do you do those group photos?” Here’s the answer for you. It isn’t massively complicated, but technical precision is required.
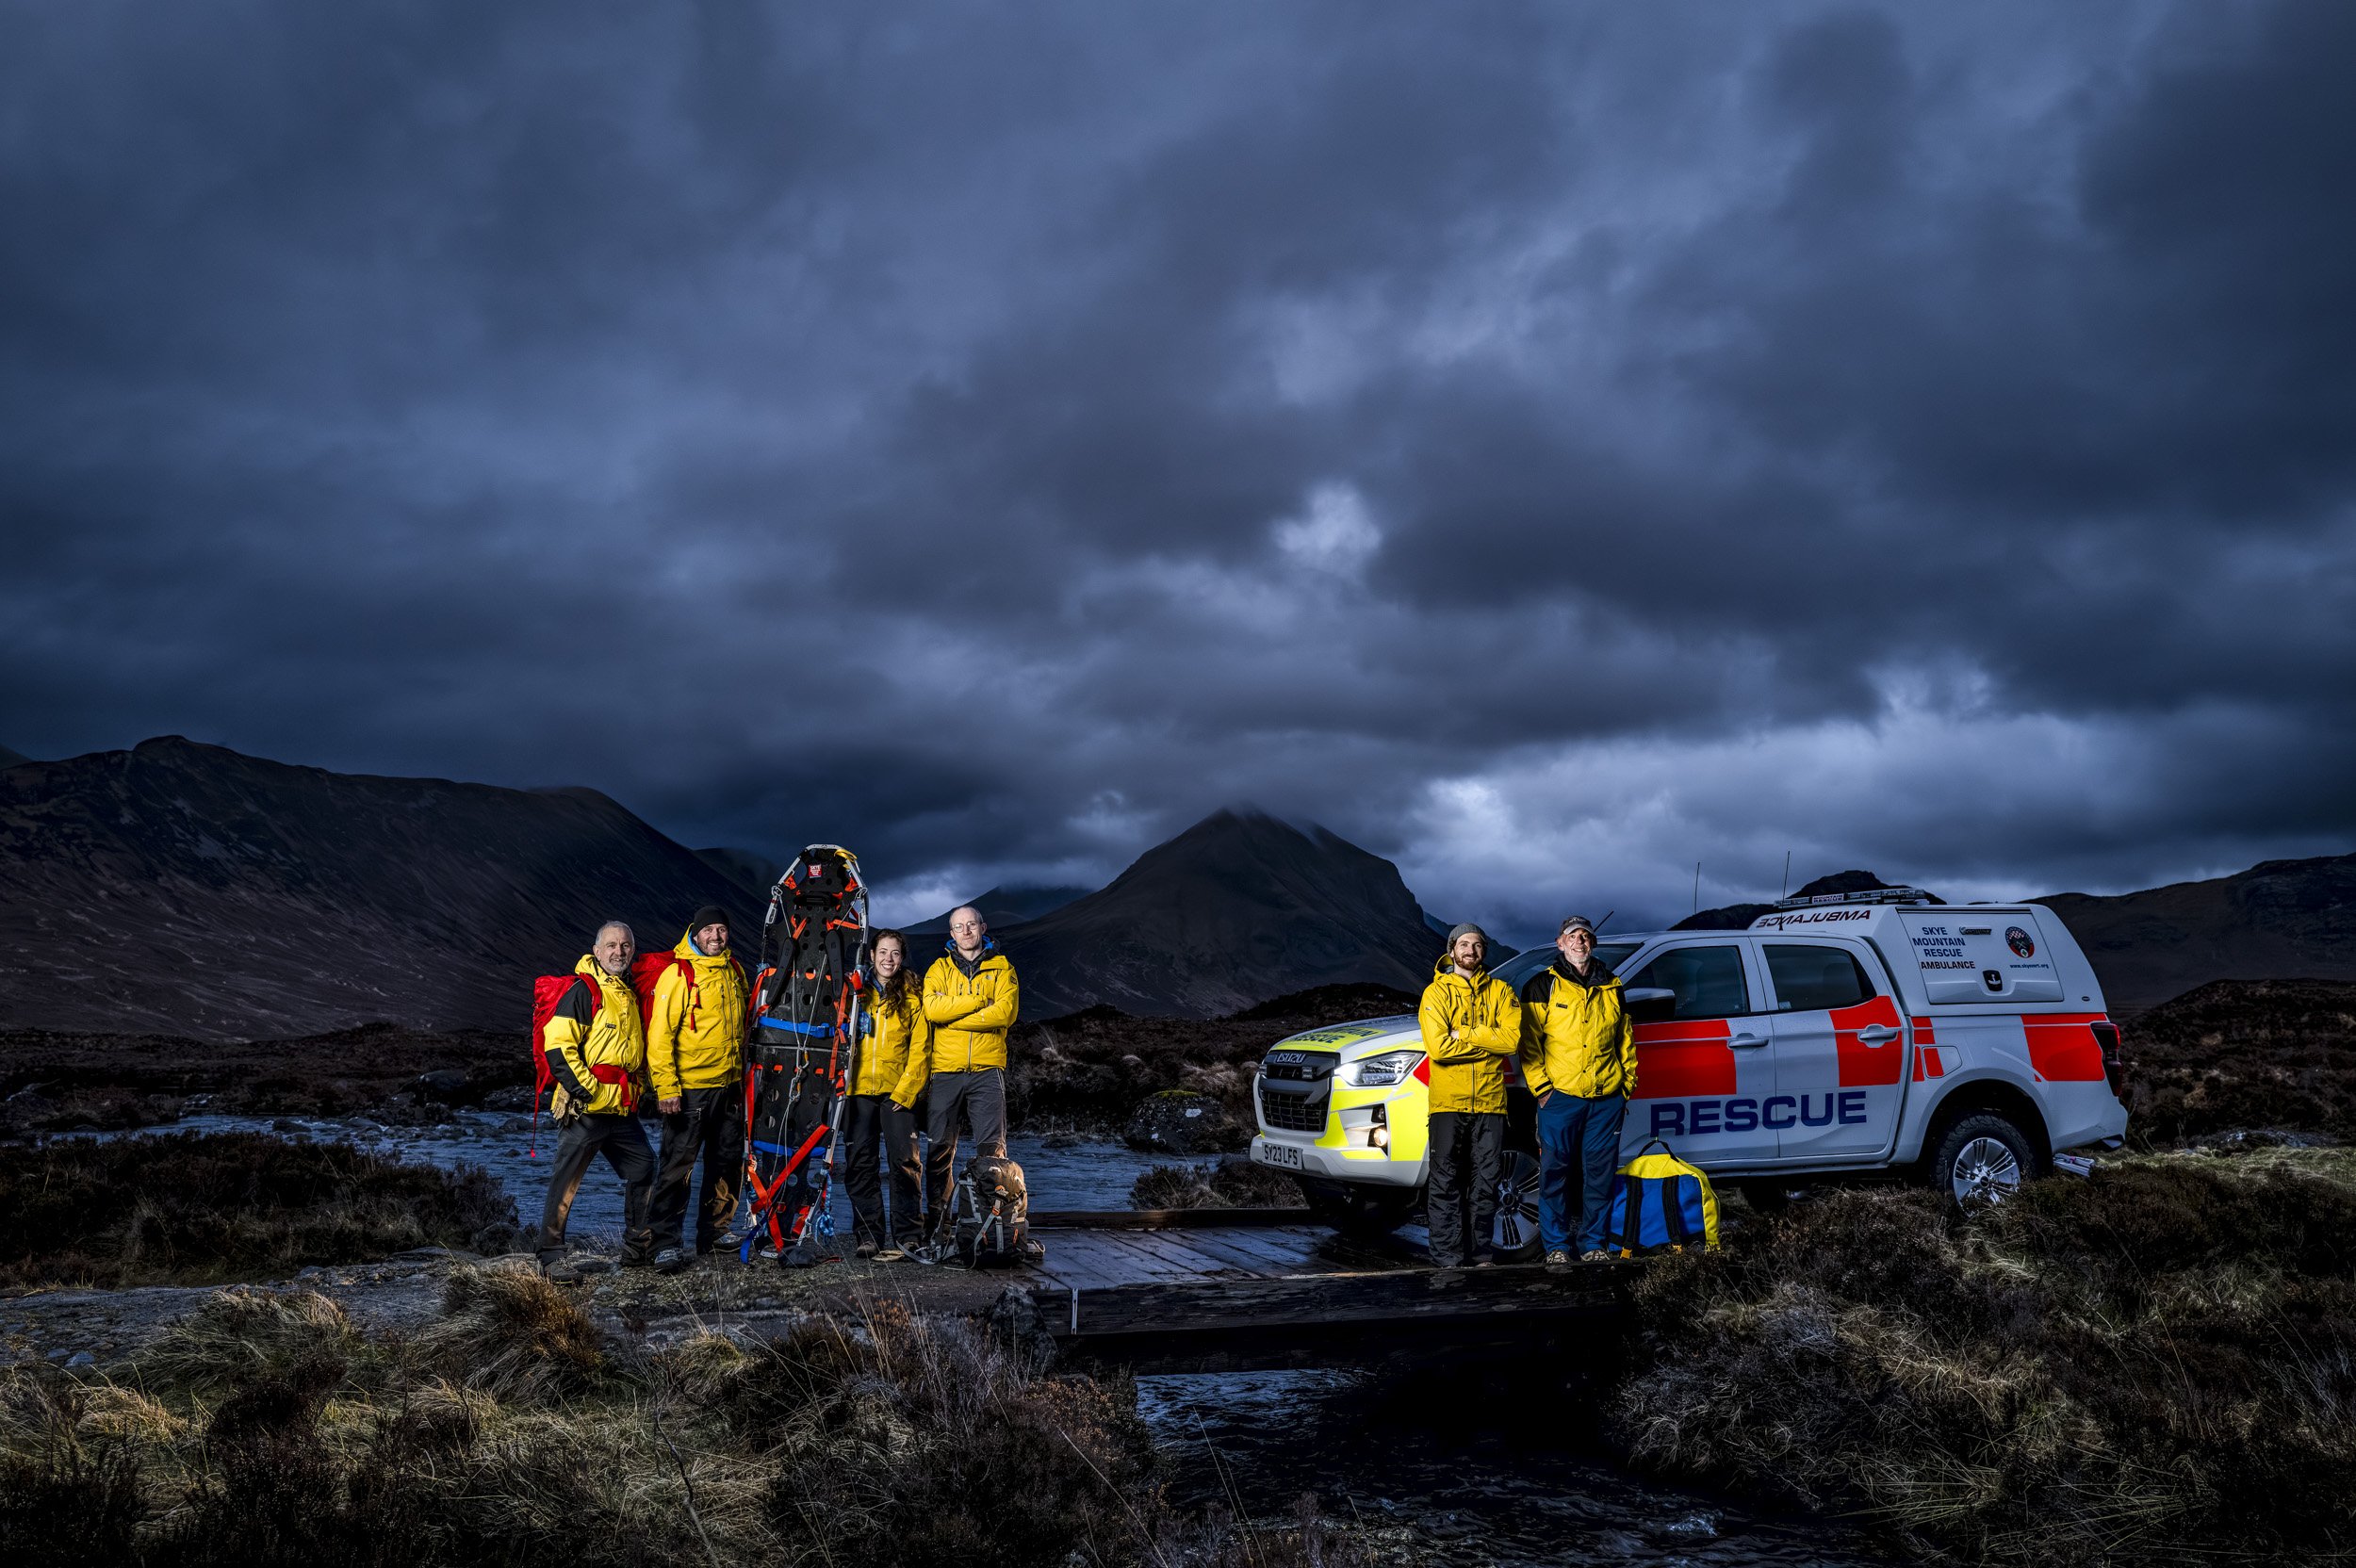
Members of the Skye Mountain Rescue Team photographed near Sligachan.
The photograph above looks very cool because the people are clearly and nicely lit, while everything else is darker and gloomy-looking, full of atmosphere. And yet there is no light in shot. And the foreground isn’t really bright, there’s no light on the vehicle, and there’s no light on the ground around the subjects. So there must be some technical shenanigans at play.
This picture is actually a composite of seven separate shots. Here’s the step-by-step process I use for this type of shot.
I start by taking a “background” image of the scene without any people in it. I use this to set the exposure and get the composition right. Because I am working at dusk after the sun has gone down, I usually have to work quickly because the light changes fast. The background image is shot once I have the composition I want, and the exposure settings dialled in. The camera is then locked down on a tripod, never to move again until the shoot is complete.
I chose 1/40th, f/4.5, ISO 800 at 28mm on my Leica Q3.
The “background” shot, with the focus, exposure and white balance set manually and locked.
I then assembled the cast. In this example I wanted to have a gap down the middle of the image because I knew I was shooting a double-page spread for the Skye At Night book. Therefore I had to leave a space for the fold between the two pages and decided to split the group in two.
I’d previously briefed everyone what was going to happen, and had scouted out the location by the small bridge to ensure I knew I could get a sense of the environment that the mountain rescue team work in. This meant that, once we were all on location, we cold get everything done fast while there was still a bit of light in the sky.
Everyone in situ, ready to go. Dark and moody.
Once I had the group in the right positions, I then had to start lighting the scene as obviously it’s rather dark otherwise.
I try and keep my lighting as simple as possible. This keeps everything simple and fast, reducing the opportunity for errors and technical problems. For the whole book, anything lit has a single key light which is a dumb flash in a small octagonal softbox, triggered by a Pocket Wizard radio trigger setup with a transmitter on the camera and receiver on the flash. Occasionally I’ll have a second or third dumb flash triggered on optical slave by the first flash.
Here I use just the key light in the octabox, and light each person individually.
A volunteer walks the light down the line as I take 2-3 shots per person. Note this is a crop of the full-sized image to show more clearly what is happening.
I set the flash power manually. It usually takes only two or three attempts to get the power correct. The power is determined by the exposure I need, and the closeness of the light to the subject. This is a vital thing to bear in mind. Because I don’t want lots of light “overspill” onto the foreground and background, I keep the light close to the subject. This means I can use a relatively low power so overspill is minimised. This is key to the “look” of the environmental portraits I have in the book.
Additionally, having the light in close gives a much softer, gentler light. It’s more flattering, and avoids harsh shadows while still providing texture and contouring.
Then it’s a matter of either me, or in this case one of the SMRT team, walking the light down the line of people while I take two or three shots of each person. I didn’t do it myself as my camera position was on the other side of a water filled ditch that was a bit tricky to leap over.
I asked each person to remain as still as possible, but some movement is inevitable.
One after another, down the line, keeping the light the same distance from the subject.
It’s important to keep the light the same distance from each subject to ensure that the light level is the same across everyone. In this case the light is on a light stand so it’s pretty easy, but as things progressed, the bridge meant there was nowhere to put the stand so my volunteer had to hand-hold the stand. Note I swapped the light holder because I needed the first one at the end of the line.
Hand-holding the light to shoot the subjects on the bridge.
After about five minutes, the whole thing is done. Note that these folks are all volunteers and have homes and dinner to get to, so I didn’t want to keep them any longer than necessary.
I did have the presence-of-mind to take a picture to show what it looks like if you try and take the whole shot in one go with just one light. As you can see below, it looks horrible by comparison. There’s so much light overspill, and the huge white 4x4 is very bright and takes the attention away from the actual people who are the subject of the photograph. The lighting is also too harsh when compared with the much softer effect you get when the light is close-in.
This shot is done in one go using the flash off-camera on the right. Looks horrible by comparison.
Once all the images are done to my satisfaction, all the team packed up the kit in the back of the 4x4 and I packed up my gear into my bag and headed home.
That’s when the fiddly stuff starts. I need to make one shot from many.
All the images are imported into Adobe Lightroom. I select the background shot and the best image of each lit person. Once I’ve done that, I open them all as layers in Photoshop. I’ll then run the auto-align feature to ensure each image is exactly lined up with the others. While the camera was on a tripod, there can still be small movements that aren’t noticeable in situ.
The trick is then to mask in each person one-by-one. This is a bit complicated and I usually forget where in the layers I’m up to and have to do it several times. But basically the masking process is about making a “hole” in the top image in the layer stack so an area of the image below can be seen. I then repeat it for the next image down the stack and so on until each lit person is visible.
This lets me combine each of the lit images together into a single shot. While I asked everyone to remain as still as possible, there is always some movement which means that great care needs to be taken during the masking process to avoid someone having two hands or eight fingers. Generally this means zooming in very closely and double-checking everything as each layer is masked.
The background image is always there in case I there’s something amiss in one of the people pictures like a contrail or a massive eagle in shot.
Once that’s all done, I’ll export a single image back into Lightroom for the final edit of exposure, saturation and so on. Then I’ll find I missed something, and the masking is off in one spot, and have to do more fiddling. For a shot like this, it was about eight hours of editing to get it spot on.
So that’s the secret. You’ll see several images in the book shot in this way. Personally I really like the combination of soft, shaped light with no overspill, and an underexposed background, to provide a feeling for the location and environment that we were in.
The final picture. Moody sky, mountains, heroic mountain rescue volunteers.


